Background
At times you will find it necessary to manually install the file server (or SharePoint, Exchange, etc.) agents instead of automatically via the Enterprise Installer or the Management Console. This may be due to internal company policy not allowing access to a file server during the installation of DatAdvantage, a malfunction that requires manual handling, etc. The steps below will describe how to get the necessary files, and how to perform the installation.
Steps Overview
- Locate and download the agent setup files (executables)
- Extract the .MSI package from the setup executables
- Run the installation of the MSI packages
Basic Events Agent Installation
- The Events MSI packages can typically be found in \Installer Package\Filer\Windows-Exchange-SharePoint-EVENTS:
- Double-click on the installation package. You will be greeted by this window:
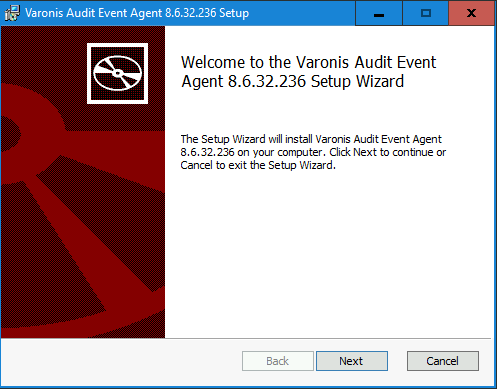
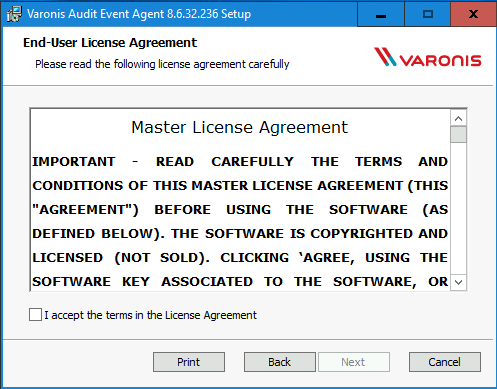
- Click Next. The following window is the End-User License Agreement. Click the checkbox to accept the terms and click Next:
- Enter in the SMTP Credentials for your organization. This information will be used to send you notifications if the service stops working.
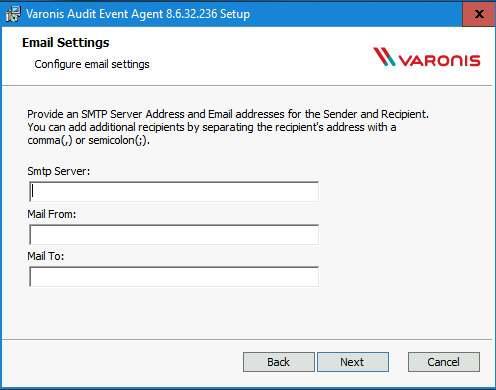
Question: Why did I never have to input this before?
Answer: That is because during file server installations, we used the information stored in the Mail Settings option inside the Management Console to auto-populate this information.
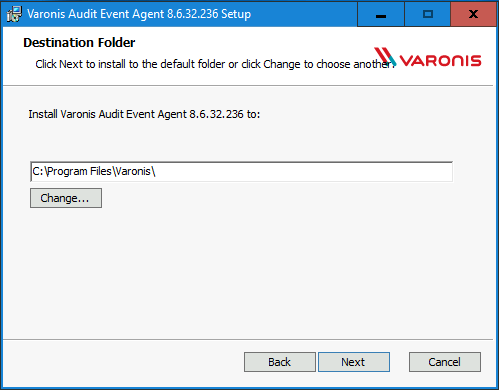
- Once you fill this out and click Next, you can select the installation path for the service. This is typically left as the default location. Click Next.
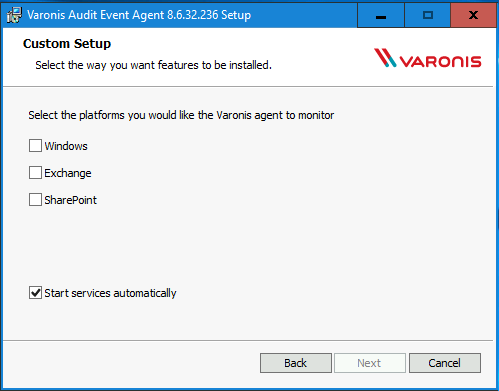
- Select the type of relevant file server/platform and click Next.
- Windows - for monitoring just a standard Windows File Server
- Exchange - for installing on a CAS or MBX, and have a configured Exchange File Server in the Management Console
- SharePoint - for monitoring any SharePoint server type, and have a SharePoint File Server in the Management Console with the Server name on it (Web Front End, Database Server, Application Server)
- Click Install to begin the installation:

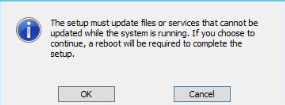
- You may encounter the following warning during install. The reboot is to load the updated filter driver for the agent service, and installation does not force this reboot. Click OK to continue the install.
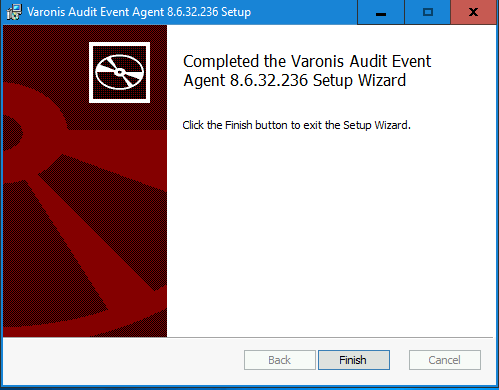
- When the installation completes, the following window is displayed:
SharePoint Agent Installation Q&A
- Is an IISReset or web app recycle required after the installation of the SharePoint agent?
- Yes, a web app pool recycle will occur during installation.
- Are there differences in the process between the initial installation of the agent and an upgrade?
Advanced Events Agent Installation
1. Locate the executables.
- The agent installer files are part of the Installation package.
- The latest GA version of the package for each major version is always available in the My Downloads section of the Varonis Support Portal.
- The installers are located under the Filers sub-folder in the package.
2. Extract the MSI files from the executable installers
- To extract the .msi from the .exe package run the following command:
<installer name>.exe /C /T:<full dest path>
or
<installer name>.exe /C
- This will extract the .msi file to the destination specified or prompt you to choose another destination.
3. Run the installation
- In order to perform a silent install from an .msi, run msiexec from the command line.
- For example: To silently install a 7.5.20 64bit Windows file-server agent, you would run the following command to extract the msi to the local folder:
Varonis-Agent-7.5.20.95-x64.exe /C /T:"%CD%"
msiexec /i Varonis.Agent.Setup.x64.msi /lxv* install.log /norestart /qn SMTPSERVER=mailserver.domain.comSMTPFROM=varonis@domain.com SMTPTO=notification@domain.com ADDLOCAL=WinAgent
- Note: The installation will produce a verbose log in the ’install.log’ file.
Recommended MSI Switches when running from Command Line:
When passing msiexec parameters via command line, all examples below have the following msiexec parameters added:
- /qn or /silent - Do not show user interface during installation
- /norestart - Do not restart upon completion
- /lxv* "%tmp%\install.log" - Save verbose log of installation into "%tmp%\install.log" file
Installing without parameters (for example: FileWalk agent):
msiexec /i <msi package file name>.msi /lxv* install.log /norestart /qn
Installing with parameters (for Example: FileAgent or UnifiedAgent):
msiexec /i <msi package file name>.msi /lxv* install.log /norestart /qn <PARAMETERS>
Available Parameters for Varonis.Agent (all versions):
- SMTPSERVER=<smtp.server.hostname.or.ip>
- SMTPFROM=<smtp.from@address.for.email.notification>
- SMTPTO=<smtp.to@address.for.email.notification>
Selecting type of agent (Starting with 5.8, there is now a Unified agent, instead of separate Windows, Sharepoint and Exchange agents):
ADDLOCAL=WinAgent
or
ADDLOCAL=SharePointAgent
or
ADDLOCAL=ExchangeAgent
Caution: The following switch should only be used in non-production installations, or when you do not want the service to start immediately after installation:
STARTSERVICES=0
Additional Note - Uninstallations:
Running the following line will uninstall the .msi package:
msiexec /x Varonis.Agent.Setup.x64.msi