IMPORTANT: Please complete the following steps before beginning the upgrade process.
1. Sign in to http://help.varonis.com and download the latest Data Security Platform Requirements from our online documentation. If you download the document as a PDF, please select the "Save all topics in Contents" option.
2. Ensure your environment meets minimum requirements. If you are unsure that your environment will meet minimum requirements, please contact your sales engineer to have your environment reviewed. Additionally, make sure the following are downloaded onto all Varonis servers:
- .NET Framework 4.7.2 and 3.5 SP1
- Java Development Kit 1.8 (Java 8) 64-bit or Amazon Corretto OpenJDK 8
- PowerShell v5.1
3. Please make sure any antivirus or monitoring software present on the servers being upgraded is disabled or configured to not affect the installation locations. The following article has more information on configuring antivirus exceptions: Antivirus Allowed List Requirements.
4. Ensure the following ports are open inbound bidirectionally from the DSP/IDU to the Collector(s):
- 135
- 139
- 445
- 5671
- 5672
- 8000
- 9111
- 15671
- 15672
5. Ensure the following ports are open inbound from the DSP/IDU to the dedicated SOLR Server(s).
- 135
- 139
- 445
- 2181*
- 2888*
- 3182*
- 3888*
*These are configurable during the installation process. The ports listed above are the default ports. If these ports are changed in the configuration, ensure those ports are open.
Note: The ports listed above are needed to perform the upgrade. For day-to-day operation and port usage, please visit the version specific documentation: Data Security Platform Ports, Protocols, and Firewall Rules.
Once you have done the above, you are clear to proceed with the upgrade.
Upgrading to the Latest Version
This step assumes that you know how to obtain a copy of the Data Security Platform Installation Package. If you need help with this, please contact Varonis Support.
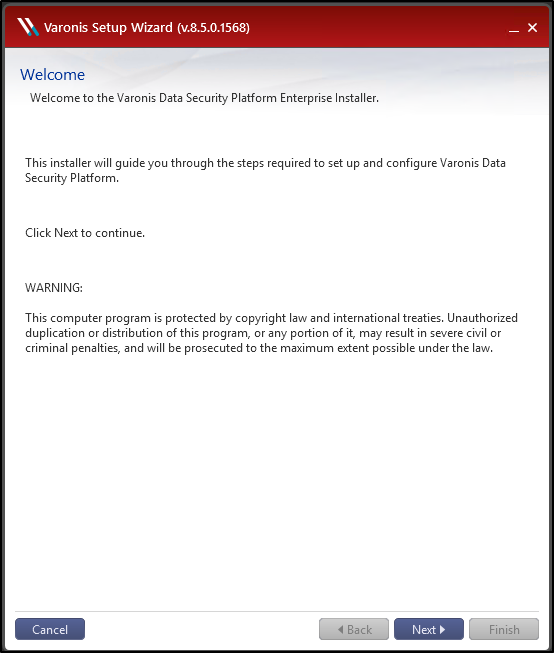
1. Unblock the zipped downloaded installer package. Extract the installer package to the IDU/DSP. Navigate to the Installer folder of the installer package and right click Setup.exe in order to Run as an Administrator. Once the extraction finishes, you can skip the introduction screen by selecting "Next."
- Example Path: C:\Users\UserName\Downloads\8.5.0.1568_XX\8.5.0.1568_XX\Installer\Setup.exe
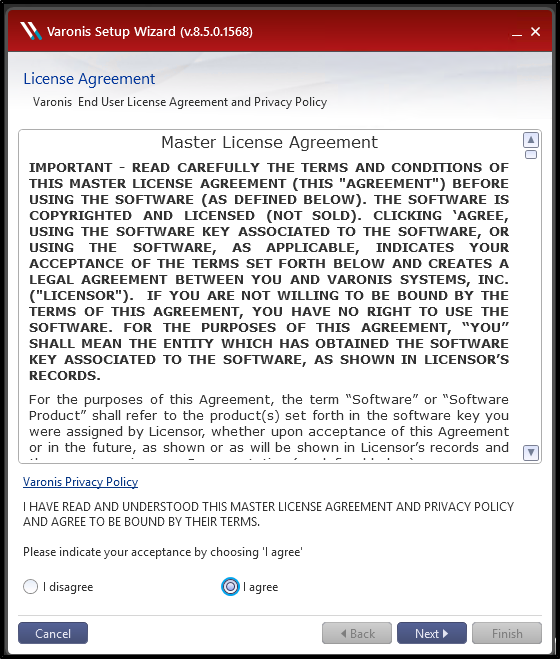
2. Review the license agreement, then select "I agree" to be able to continue.
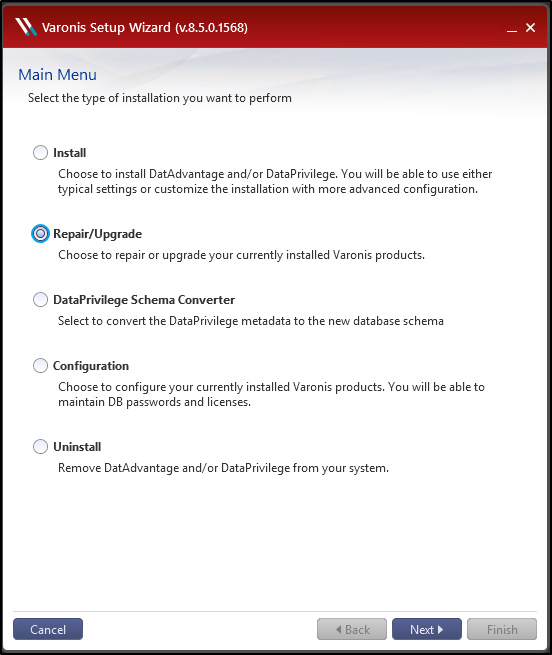
3. Select "Repair/Upgrade" from the Main Menu.
4. Select the SQL server and instance (if applicable) that holds the Varonis databases for "Database Server," then enter credentials for an account with SA-level access to the SQL server. It does not need to be the SA account itself, but equivalent SQL permissions is necessary in order for the upgrade to complete successfully.
Note: These credentials will not be saved. They are used only for the upgrade process.

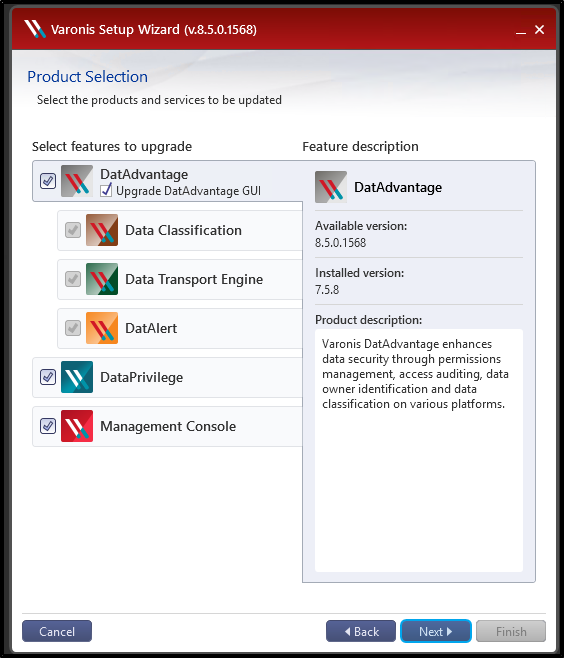
5. The Product Selection window will list the products to be upgraded. Verify all purchased products are listed before selecting "Next."
6. Your license will be validated automatically if the DSP server has an internet connection. If the DSP server is not connected to the internet, or the automatic validation fails for any reason, you will need to manually register the upgrade.
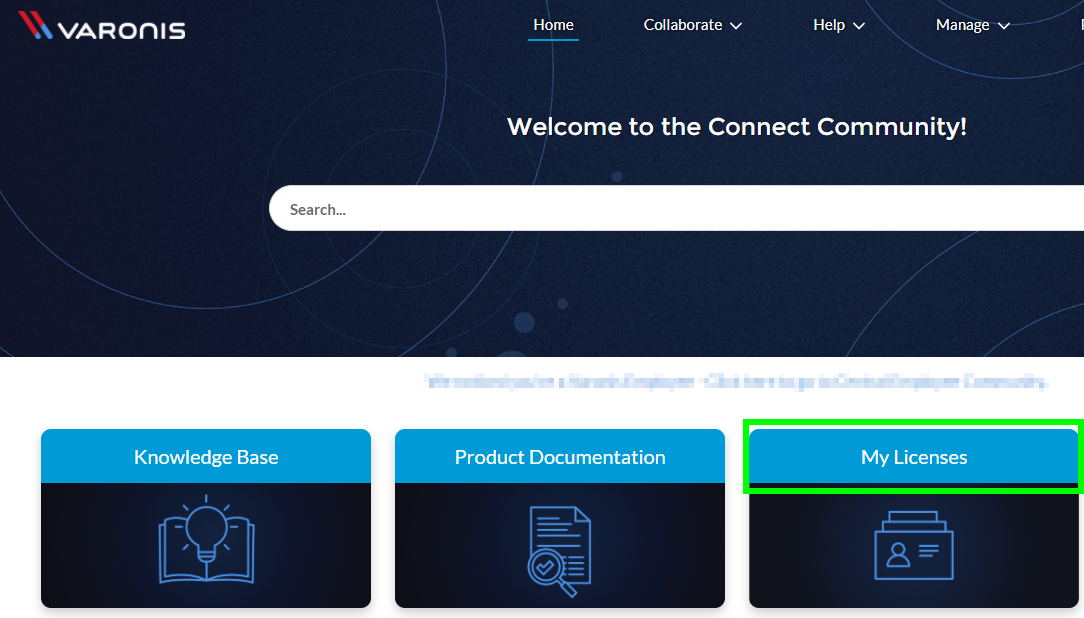
If necessary, the license can be manually registered by logging into https://help.varonis.com and selecting "My Licenses":
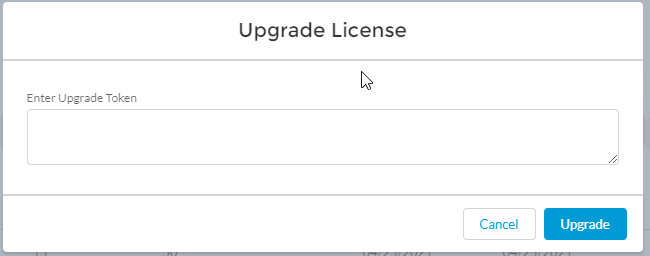
Select the license you wish to upgrade:

Select "Upgrade":

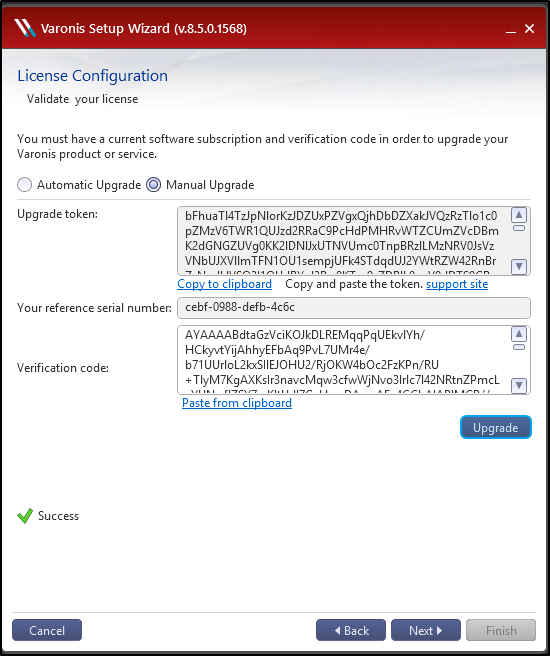
Enter the upgrade token and click "Upgrade":
You will receive the a verification code, enter this into the Setup Wizard and click "Upgrade". Once the "Success" message appears, click "Next".
If you receive an error like what is being displayed below, follow the procedures listed in KB article How To Register a License using the Varonis Setup Wizard. Once the license has been registered, return to step #6.

7. Ensure all file servers have associated logins. An account with local administrator-level access will need to be used. All empty credentials will need to be filled.
Disclaimer:
- These credentials will be used in order to upgrade the Agents of the respective File Servers.
- If you are not be upgrading the agents at this time, understand that they must be upgraded in order to take advantage of new features.
- A reboot is required on all monitored Windows file servers in order for the new agents to be loaded.
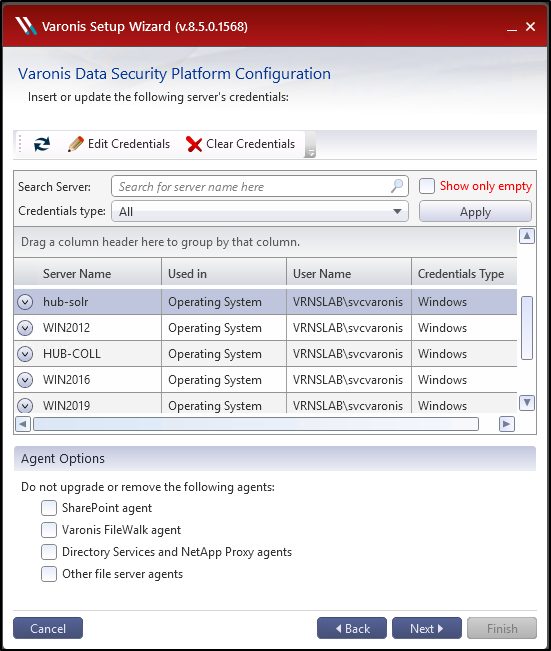
In addition, this is where the options for the agent upgrade can be selected. By default, agents are not automatically upgraded during this process. Uncheck the boxes as shown in the screenshot above in order to enable the automatic agent upgrade.
Note that upgrading agents does not force a server reboot. While a reboot is required in order for the new agents to take effect, they will continue to function at their current level until you are able to reboot the servers.
If you would prefer to upgrade the agents manually, you may leave the agent options as they are.
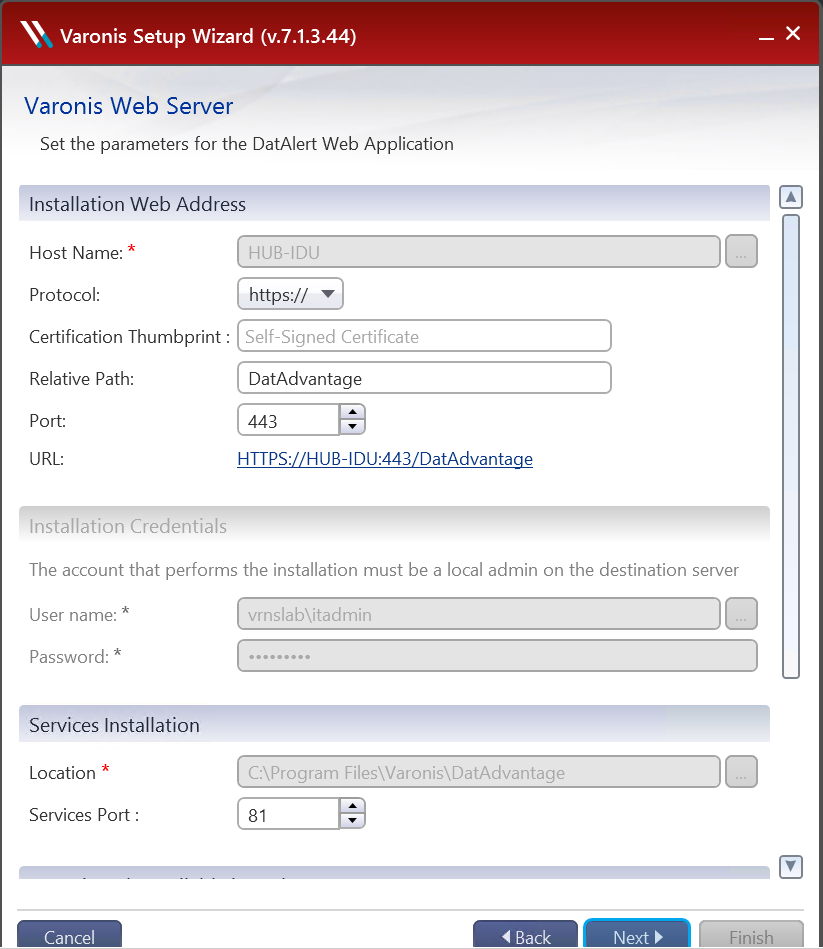
8. If necessary, input the information for the Varonis Web Server. Usually this will grab the information already present if a previous installation exists (previously know as the DatAlert Web Server). However, you may need to re-enter your certificate information.
Note: If you are upgrading from Version 7, you will not be prompted for this information. It will carry over from the previous configuration.
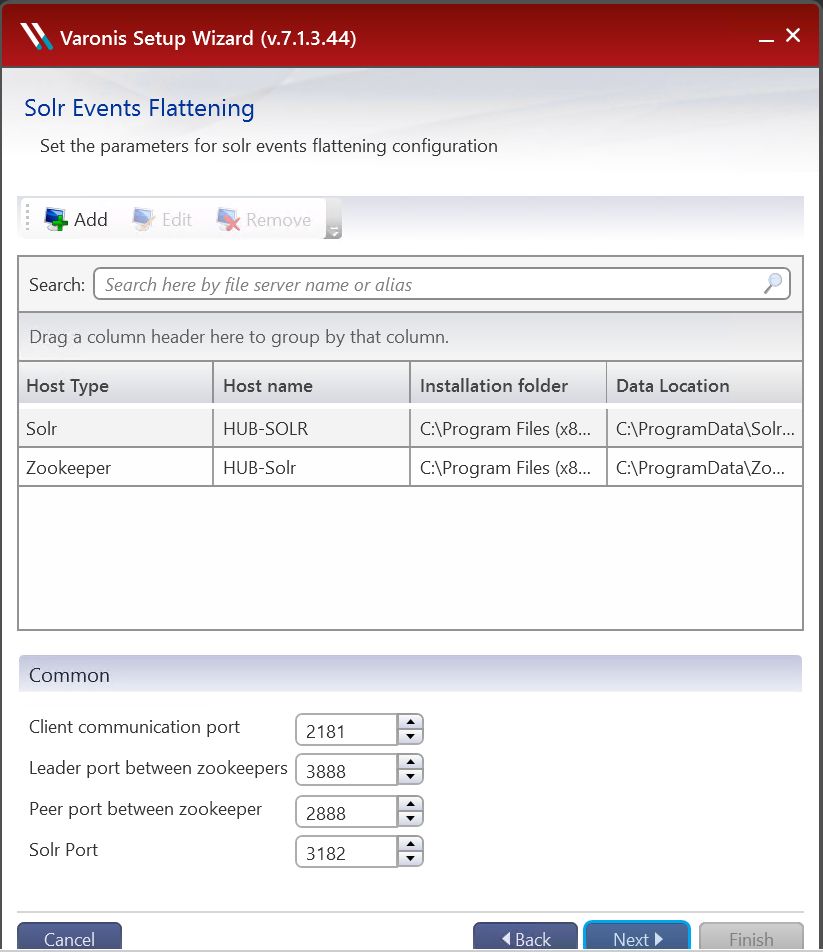
9. Next is Solr/Zookeeper Server Configuration.
- This new server will be used to process audit events to the Varonis Web Server. (Commonly known as the Log Area Report and Report 1.a.01)
- With this, you will have the ability to run auditing events report at unprecedented speeds!
- This is a new required server. You do not have the option to skip this step.
- For information on what hardware requirements are need for this server, please reach out to your Account Manager or Systems Engineer.
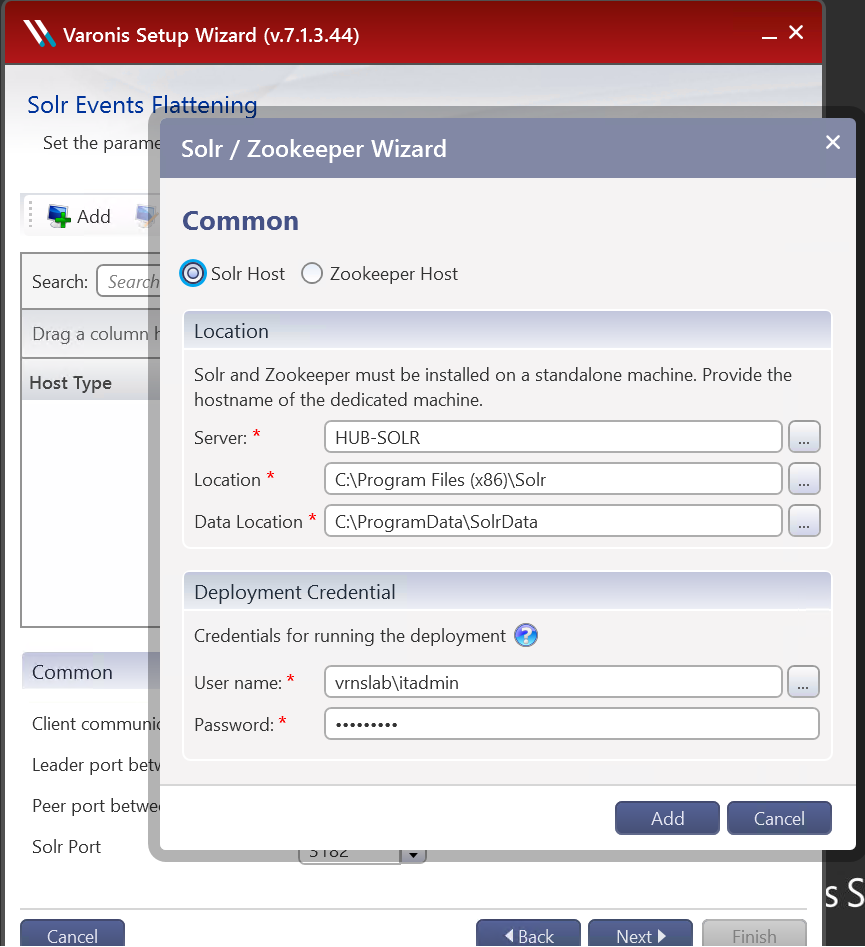
Select Add, then input the host name of the Solr server and the path location of the install directory. You will also need administrator-level credentials to access the server. This account will also need to have access to the listed directories. You can then repeat these steps to add the Zookeeper server by switching the option at the top of the wizard to Zookeeper.
Note: You can have both the Solr Host and the Zookeeper Host on the same server.
If you are upgrading from Version 7, you will not be prompted for this information. It will carry over from the previous configuration.
After adding the servers, verify the port settings listed under "Common." Generally it should be fine to use the default port settings; however, we recommend testing connectivity between the DSP server and the Solr/Zookeeper Server(s) in order to ensure they can communicate.
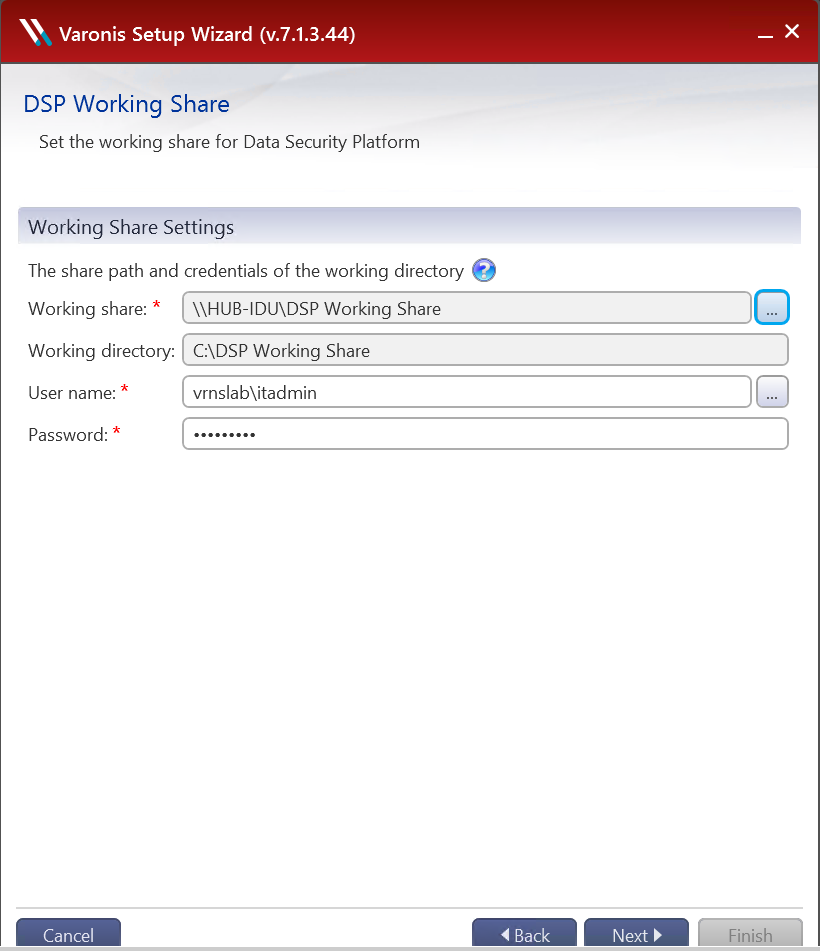
10. Create a shared folder that can be used as the DSP's Working Share. Be aware that this share will be used to hold a large amount of data, and locate it accordingly. Enter the path and ensure that the listed credentials have read/write access to the folder.
We do not recommend using the C: drive as the primary location for this share.
Note: If you are upgrading from Version 7, you will not be prompted for this information. It will carry over from the previous configuration.
11. Choose your settings for Live Update. This depends entirely on the comfort level of the user. Enabling Live Update will allow you to receive patches, bug fixes, etc. directly to your system as they are released, but it is not a required feature. If you do choose to enable Live Update, make sure that you also select whether you would prefer these updates to be installed automatically or with your approval via email.

If you later decide you would like to adjust your Live Update settings, this can be done via the Configuration section in the Management Console under Live Update.
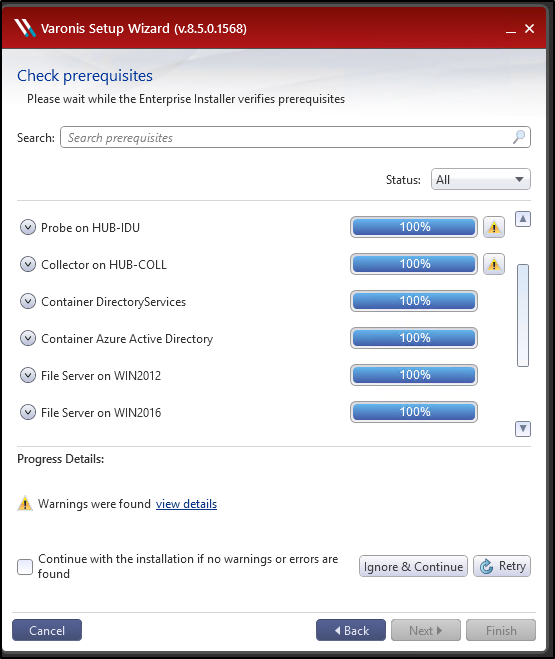
12. Select "Next" to begin the prerequisite check. This will scan to see if there are any unmet prerequisites that might cause the upgrade to fail. If you receive any warnings or errors, select the Red X or Yellow Triangle symbols, make the stated adjustments, and then rerun the scan by selecting "Retry". You can begin the upgrade with warnings present by selecting "Ignore and continue" as long as you've verified that the provided suggestions (i.e. a TLS 1.2 warning that recommends checking our configuration guide) have been followed.
13. Select 'Next' to start the pre-installation steps. As before, if you encounter any warnings or errors correct as necessary; if you encounter an error you do not know how to resolve, please reach out to Varonis Technical Support with the text of the error.

14. Select "Update" to begin the bulk of the upgrade. The process is mostly automatic; we recommend allowing it to run and checking roughly every 30 minutes to ensure nothing is impeding progress. Selecting the drop-down carat next to an upgrade step will allow you to see which part of the upgrade is currently running.
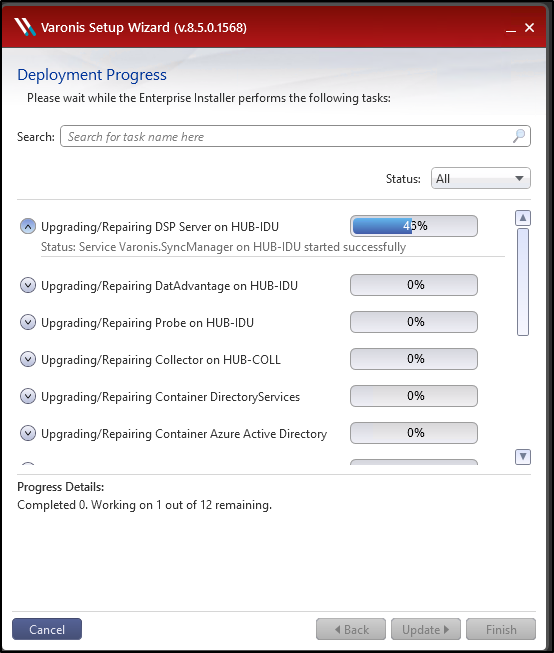
The ETA for the upgrade will vary depending on your environment. Once it has finished, select "Finish" to complete the process.
If you receive any errors during the upgrade that cause it to fail, please contact Varonis Technical Support immediately with a screenshot and transcript of the error message so we can assist you with resolving it
- Do not close out of the installer! Logs can be collected from %Temp%\VaronisInstall\Logs.
- Additionally, we recommend scheduling a health check with Varonis Technical Support in order to ensure that your environment is working as expected post-upgrade.
Otherwise, congratulations on your successful upgrade!